Thursday, 8 August 2013

New Goodies

Hi, Just a quick post...

I've been on a little shopping spree today to top up my makeup essentials, as they're running low. I usually use a collection of Estee Lauder, YSL, and MAC. But as I'm not exactly a millionaire after my recent extravagant travels, soooo I thought I would test and review some other cheaper products and give you the low down!


New Goodies


Blusher: Max Factor, colour 223 natural glow. aka Rose pink! £5.99

Transluscent eyebrow highlighte: Rimmel, colour 100 glam ice. aka white £3.99

Bronzer: seventeen, colour light bronze £4.99

Concealer: 17, colour medium dark. £3.99

Eye brow pencil: Maybeline, colour soft brown. £2.99

After spending a good hour testing different brands, colours and prices in boots, I came out with these products. I'm gonna give them a try over the next week and see how they measure up. 

Follow me to hear the next instalment next week about the quality of these products, how they look and how they cpmpare to my other expensive brands I normally use!


signing out 


Wednesday, 7 August 2013

Follow my blog with Bloglovin

These are a few of my favourites things....

No matter how many new pieces of clothing we try or how much we experiment with the current trends, we all have those few key pieces we cannot live without. When it comes to my outfits, I absolutely love love love my black suede gladiator style sandals. They are quite old now and were really cheap from Primark, but they're so comfy and I always get complimented on them. If truth be told, they belong in the trash. I actually bought a new pair from River Island, which are gorgeous, but I still wear my old ones and can't bring myself to get rid!


My hair might be long and thick, but it's straight as straw and sticks flat to my head. I've back combed it for years to try and get a bit of volume, which actually turned my hair to straw... until I found my salt spray, my hair's best friend. I don't go anywhere without it and is a quick fix for flat, dull hair!
L'Oreal salt spray: £4.00 from Boots

I'm a bit of a make up fiend and even on holiday, around the pool, I still wear it. But my life saver for the summer seasons is a tinted moisturizer. I literally take it everywhere with me. It's just enough to bring you back from the dead. It's also waterproof and contains spf, so no danger of patchy, sunburnt skin... which is never a good look, even if you look like Cara Delevigne. I use MAC tinted moisturizer, but if you don't want to spend that much, there are cheaper alternatives, which I have tried in the past, which work well too. The MAC studio moisturiser tint is £21, but I go to a makeup outlet and get it for £13 - bargain!!!!  Or you can go online to get these quality products. Try some of these:

http://www.lovecosmetics.com/index.php

http://www.thecosmetichouse.co.uk/


Here's the Low Down...
Urban Decay: £12

Clinique: £22

Rimmel: £6.99

Nivea: £9.99

No7: £9


After trying these tinted moisturizers, my fav (apart from MAC) was the urban decay. It's not badly priced and left my skin looking natural, but even and smooth, hiding all blemishes.


I don't have a bad word to say about Clinique. This product actually won best tinted moisturizer of the year, but isn't compatible with a budget. If you want to pay a little more... go for this!


Rimmel's moisturizer worked ok. It was thin and light, but I found it didn't cover any blemishes and went patchy quite quickly.


Like all Nivea products, this was no different. It was quite thick and felt lovely on my skin. It definitely held the moisturizing part of the deal, but as a tinted moisturizer? No. I felt it made my skin a little bit greasy looking.

Annnnnd in last place is No7. The consistency was thin and translucent and when applied to the skin, went very shiny and wet looking.


Of course everyone has different skin and what works for me, may not necessarily work for you. The reason I use MAC is that I find it works well with my skin... it doesn't clog, goes on matte and best of all leaves my skin feeling soft. 

Signing out


Tuesday, 6 August 2013

Just another day in Paradise

Diary Entry 2:
 
The first day in Kenya, it was hot and humid! And I mean HOT!!! So with that in mind, I wanted something loose and pretty. I kept it quite simple with a baggy cami and swing skater, with my fav haviannas flip flops.
 
 
CAMI: H&M £3.99
SKIRT: Zara £19.99
BAG: Ralph Lauren (TKMAXX) £25.99
SUNNIES: Primark £2.50


    Haviannas: Selfridges £20.00         Messy Knots and Buns
 
 
I tied my hair into a loose knot on top of my head to keep it out of my face and to help with the tanning process of course. This is a really quick and easy way to do your hair - the messier, the better!
 
 
Signing out


Monday, 5 August 2013

The Style Diaries

Diary entry 1:
 
Hi ladies! OK so here's my first diary entry for my ultimate African/holiday outfits. I thought I'd begin with my travel outfit. I'll give you a tip... I know you just wanna chuck on a pair of sweats and converse, (especially if your flights at a ridiculous time), but the thing is, wear heels! My logic is, if you're wearing a pair of your heels that you will be taking with you... there's more room and weight in your suitcase! The chunkier and heavier, the better! Plus they look good and gets your holiday vibes brewing!
 
Here's how I styled it!

DRESS: Topshop
WEDGES: Topshop £45
BLAZER: Zara £70
SATCHEL: Asos £25
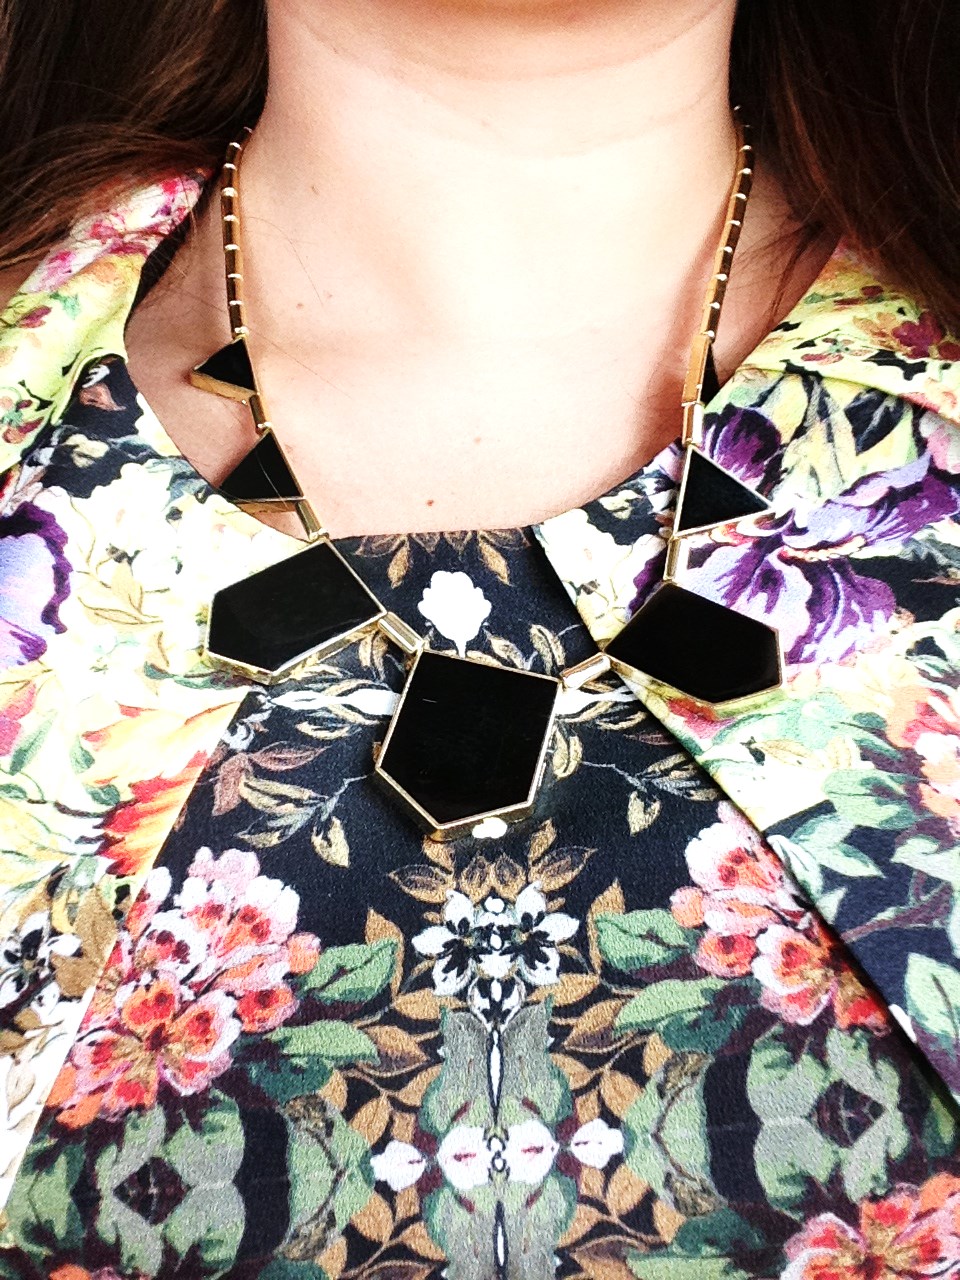
NECKLACE: Adorning Ava £6


I went for a simple pair of tan cross over wedges from TOPSHOP.I paired it with a skater style fitted dress, covered in a bright floral print. It's actually SS12 collection from Topshop (a Tulissa fav), but I absolutely love it and paired with the right garments, it looked bang on trend. The blazer pulled the whole outfit together.
 
 
EARRINGS: Forever 21 £3.99
 
I kept jewellery to a minimum with a simple pair of oversized studs and a black geometric necklace. A large bag was essential, therefore the tan satchel from ASOS was perfect...you can't go wrong with a classic hanging off your arm. It fits all your iphones, ipads, kindles, lippy and mascara (oh and passport) in and still in keep with your chic look. 


I kept my makeup and hair quite natural, as there's nothing worse than coming off the plane countless hours later with smudgy panda eyes and kinky hair. My key beauty product was my eyebrow pencil from MAC £18. A strong brow defines your whole face, no matter how little makeup you have on. It keeps your face looking defined and perfected without painting your face.
 
More style Diaries to follow shortly..... keep tuned in!
 

Signing out


Jambo Jambo


Well, I have just returned from spending two weeks in the beautiful continent of Africa! And honestly? I didn't want to come back to the UK. While I was there, I was partaking in a safari in the Massai Mara, dolphin watching, African dancing and going out in the evening.
 

This summer, luckily for me, safari and ethnic trends have been huge, overtaking the whole of the high street this season. So you can guess that everything from my shoes to my jewellery was bright, ethnic and an abundance of colour, patterns and prints.


Over the last fortnight, I put together a bit of a style diary, featuring my best outfit ideas, favourite garments, must have accessories and key pieces for the ultra holiday wardrobe. The next few posts will be my style diaries, so hopefully you guys can take a bit of inspiration and use my info to nail these summer trends before we lose the sun to Autumn, along with new AW13 collections. Make the most of August and the sunshine! 

Signing out 


I whip ma hair back and forth....

When it comes to my hair, I used to be pretttty boring. It was highlighted blonde... standard!
Standard Blonde
That was basically it for 9 years and then one day I thought what am I so worried about? So, I dyed it chocolate brown.
It was a bit of a shock at first, but I got the hair bug. Since then, I have been every colour, from dark brown to ginger to red to light brown to caramel blonde, ombre, dip dyed blue, chalked and alas light brown with natural light tones in. It is always great fun to see if it works, especially when I dip dyed my hair blue for v fest last year.
Soooooo, I thought I would show you guys how to dye your hair from home. It is quite scary and daunting at first, but really easy.
HAIR DIARIES
I have tried different products in the form of crèmes, foams, gels, but I have found a mask works the best, especially if your a bit of an amateur.
Ok sooo, here we go!


The hair mask I used was a Schwarzkopf in a light brown shade. Just in case you don't know, if you have really dark natural/dyed hair, a lighter shade won't cover it, unless you use bleach or you could strip/remove the colour first .


Don't forget to read the instructions, the danger of sounding like your father... and if you have sensitive skin, do a skin test the night before to make sure your not allergic.


Basically, all you need to do is open the lid of the hair mask and squeeze in the developer.


And then screw the lid back on.


ANNNNNDDDD  shakeit... shakeit... shake it like a polaroid picture!

Now it's time to get messy. Make sure you've got an old tee on that you don't mind getting hair dye on. Also, you might want to put an old towel on your desk just incase there's a spillage. Put your little plastic gloves on that you get in your kit and your ready!!!

Because my hair is really long and thick, I do it in four stages. I split my hair down the middle horizontal and vertically. Start at the top at your root and slowly work down the length of your hair. Use a comb or brush to make it evenly spread through your hair.


After you've done one quarter, move onto the next and then the bottom two parts.


Run your hands through all of your hair and make sure every strand is covered.


If you have any extra dye on your head, ears or neck, get it off with a baby wipe or make up remover, or it will stain your skin.


 Leave it for 15 mins.. tea break!


After 15 minutes, use the rest of your hair dye to cover the very ends, as they'll be the driest part of your hair. Leave it again for another 15 minutes... Cake break ;)


Then it's time to step in the shower or stick your head over the bath (my way) and wash off all the dye and wash your hair twice with shampoo. Then towel dry your hair ready to put the colour mask conditioner on.


Put the colour mask conditioner on and comb it through roughly to moisturise your hair. I leave this on for a couple of minutes before rinsing it off.


Once all the conditioner is out ... basically just dry your hair and that's it!!!


 TAAA DAAAAAARRRR!!!!


I love everyone who visits my blog... you are

Follow this blog with bloglovin

Follow on Bloglovin
Follow on Bloglovin

Grab my Button

astringofstyle
<a href="http://astringofstyle.blogspot.co.uk/" target="_self"><img src="http://i1361.photobucket.com/albums/r667/becky_glover1/250_zpsec4a52a9.jpg" alt="astringofstyle" width="125" height="125" /></a>
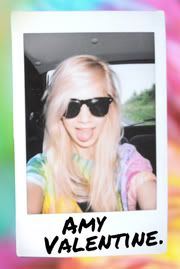
Amy Valentine

My Favourite Brands

All Saints

Urban Outfitters

Forever21

Topshop